Summary:
You spot mold in the bathroom grout. Then notice discoloration in the attic. Maybe there’s a musty smell creeping up from the basement. Suddenly, you’re dealing with three different mold problems in three different rooms—and the internet’s giving you fifty different solutions.
Here’s what actually matters: mold doesn’t behave the same way in every room. The moisture source is different. The materials are different. And the approach that works in your bathroom might make your basement problem worse.
This guide breaks down what you’re really dealing with in each space, how to tackle it the right way, and when it makes sense to bring in help before a manageable situation turns into a major headache.
Bathroom Mold Removal: High-Humidity Solutions
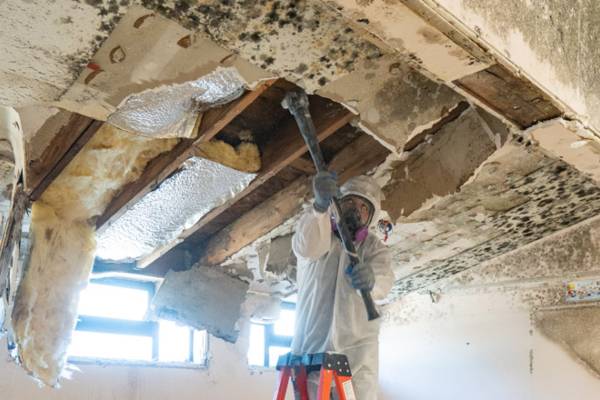
Bathrooms are mold’s favorite room for a reason. You’ve got heat, moisture, and surfaces that stay damp longer than they should. Shower steam condenses on walls and ceilings. Grout lines trap water. Ventilation can’t keep up.
The mold you see on your shower curtain or tile isn’t the whole story. It’s telling you that moisture is lingering too long after every shower, and unless you change that pattern, you’re just cleaning the same spots over and over.
Bathroom mold removal starts with breaking the cycle. That means improving airflow, drying surfaces faster, and addressing any leaks hiding behind walls or under sinks that keep feeding the problem.
Removing Mold from Walls and Non-Porous Surfaces
If you’re dealing with mold on painted walls, tile, or glass in your bathroom, you’re working with non-porous surfaces—which is good news. These materials don’t absorb moisture the way drywall or wood does, so mold typically stays on the surface where you can actually reach it.
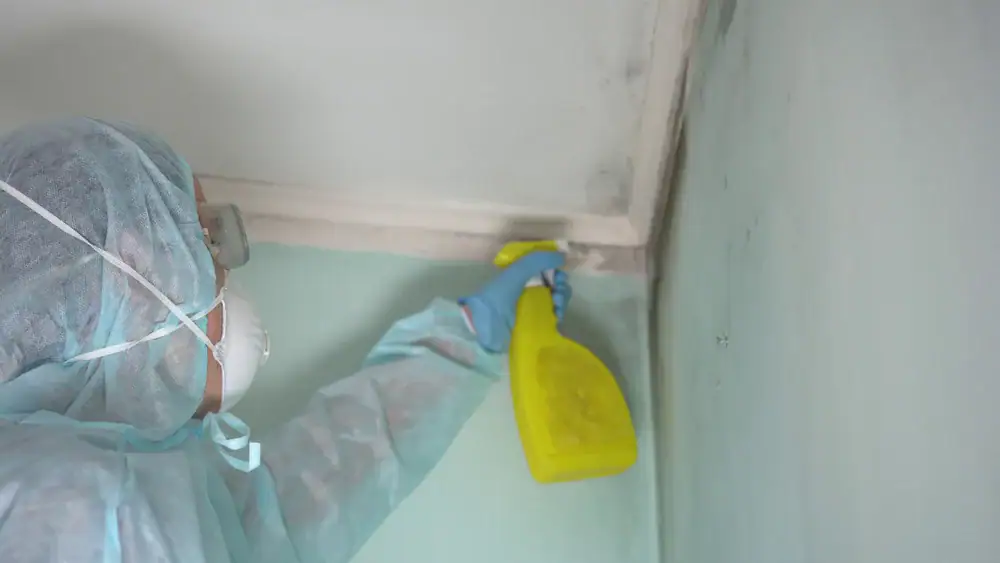
For small areas under 10 square feet, you can handle this yourself. Put on gloves, eye protection, and a mask to avoid breathing in spores. Open a window or turn on the exhaust fan. Mix a cleaning solution—either a cup of white vinegar in a spray bottle, or if you’re dealing with stubborn growth, a mild detergent and water. Spray the affected area and let it sit for 10 to 15 minutes. Then scrub with a brush or sponge, rinse with clean water, and dry the surface completely.
The drying part isn’t optional. Mold spores are everywhere, and they only need moisture and 24 to 48 hours to start growing again. If you leave the area damp, you’re setting yourself up for round two.
Here’s where most people get tripped up: they clean the mold but never fix why it showed up in the first place. If your bathroom doesn’t have an exhaust fan, or if you’re not running it long enough, moisture has nowhere to go. It settles back onto the same walls and tile, and the mold comes right back. Run your fan during your shower and for at least 20 minutes after. If you don’t have a fan, crack a window. Airflow is what keeps surfaces dry.
Grout lines are trickier because they’re porous. Mold can work its way into the tiny gaps, and surface cleaning won’t always get it all. If you’ve scrubbed your grout multiple times and mold keeps reappearing in the same spots, that’s a sign moisture is getting behind your tile. That’s also a sign it’s time to call someone who can check for hidden leaks or failing caulk that’s letting water seep where it shouldn’t.
One more thing: if you’re seeing mold on your bathroom ceiling or high up on the walls far from the shower, that’s often condensation from poor ventilation, not a direct water source. It means your bathroom isn’t drying out between uses, and improving ventilation should be your first move—not just cleaning the mold.
When Bathroom Mold Needs Professional Attention
Not all bathroom mold is a DIY project. If the affected area is larger than 10 square feet—roughly a 3×3 section—the EPA recommends bringing in a professional. At that size, you’re dealing with enough spores that containment becomes important. Without proper equipment, you risk spreading mold to other parts of your home while you’re trying to clean it.
You should also call a pro if mold keeps coming back after you’ve cleaned it. That’s not a cleaning problem—that’s a moisture problem. Something behind the scenes is feeding the mold, whether it’s a slow leak inside the wall, a poorly sealed shower pan, or a ventilation system that’s not doing its job. A professional can use moisture meters and thermal imaging to find the source you can’t see, fix it, and then remove the mold in a way that actually sticks.
If you’re seeing mold on drywall, and the drywall feels soft, spongy, or discolored beyond just surface staining, the mold has likely penetrated deep into the material. Drywall is porous, and once mold gets inside, you can’t scrub it out. The affected section needs to be cut out, the moisture source needs to be addressed, and new drywall needs to go in. That’s not a weekend project—that’s a restoration job.
Black mold is another red flag. While not every black-colored mold is the toxic variety, you can’t tell just by looking at it. If you’re dealing with dark, slimy growth—especially after any kind of water damage or flooding—don’t try to remove it yourself. Disturbing it can release spores into the air, and if it’s the toxic type, that’s a health risk you don’t want to take. Let someone with the right protective gear and containment equipment handle it.
Finally, if anyone in your home is experiencing worsening allergies, asthma, or respiratory issues that seem to flare up at home, don’t mess around. Mold exposure affects people differently, and for some, it’s more than just an annoyance. Get a professional to assess the situation, remove the mold properly, and make sure your indoor air quality is safe again.
Attic Mold Removal: Ventilation and Moisture Control
Attic mold is one of those problems that hides until it doesn’t. Most people don’t spend time in their attic, so mold can grow for months—sometimes years—before anyone notices. By the time you see it, it’s usually covering roof sheathing, rafters, or insulation.
The tricky part about attic mold is that it’s almost never caused by a leak you can see. It’s usually condensation. Warm, moist air from your home rises into the attic, hits cold surfaces during winter months, and creates the perfect environment for mold to thrive. Poor ventilation makes it worse because there’s no airflow to dry things out.
If you’ve got mold in your attic, you’re dealing with a ventilation problem, a moisture problem, or both. And until you fix those, cleaning the mold is just buying time.
Identifying the Moisture Source in Your Attic
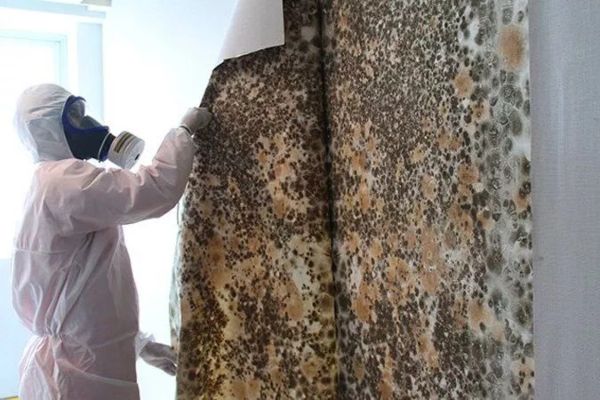
Before you do anything else, you need to figure out where the moisture is coming from. Check for roof leaks first—look for water stains, discoloration on the wood, or any spots where daylight is coming through. Roof penetrations like chimneys, vents, and skylights are common leak points. If you see isolated water stains in one area, that’s usually a roof issue.
But if the mold is spread across a large area of your roof sheathing, especially near the eaves or across multiple sections, that’s condensation. It means warm, humid air from your living space is getting into the attic and meeting cold surfaces. That can happen if your bathroom exhaust fan vents into the attic instead of outside, if your kitchen range hood isn’t vented properly, or if you’ve got gaps around recessed lights or attic hatches that are letting air escape.
Check your insulation, too. If it’s damp or compressed, that’s a sign moisture has been building up. In Wisconsin’s cold winters, you might even see frost on the underside of your roof sheathing. When that frost melts, it drips down and creates the moisture mold needs to grow.
Ventilation is the other half of the equation. Your attic needs both intake vents—usually soffit vents along the eaves—and exhaust vents, like a ridge vent or roof vents near the peak. If you’ve got exhaust vents but your soffits are blocked by insulation, or if you don’t have continuous intake, air can’t move through the attic the way it should. That trapped, stagnant air holds moisture, and mold follows.
If you’re not sure what’s causing the problem, or if you’ve fixed what you think is the issue and mold keeps coming back, bring in a professional. We can assess your ventilation system, check for hidden leaks, and use moisture meters to find problems you can’t see. Fixing the wrong thing wastes time and money, and mold doesn’t wait around.
Attic Mold Removal: DIY Limits and Professional Solutions
Attic mold removal is not like cleaning mold off a bathroom wall. You’re working in a cramped, hot space with limited ventilation, and one wrong step can send you through the ceiling. Even experienced restoration techs treat attics as high-risk work environments. If you’re not in good physical condition, or if you’re not comfortable working in tight spaces, this isn’t a DIY job.
If you do decide to tackle a small area yourself—and we’re talking a patch smaller than 10 square feet on solid wood, not insulation—you’ll need an N95 mask, gloves, goggles, and protective clothing. You’ll also need to contain the area as much as possible so spores don’t drift down into your living space. Open attic vents to improve airflow, but keep the attic access closed off from the rest of your home.
For cleaning, a vinegar solution or a detergent and water mix can work on surface mold on plywood or sheathing. Scrub gently, then dry the area completely using fans or dehumidifiers. But here’s the thing: if the wood is stained dark, feels soft, or shows signs of rot, surface cleaning won’t fix it. The mold has penetrated the material, and the damaged section may need to be replaced.
If mold is on your insulation—whether it’s fiberglass batts, cellulose, or spray foam—you can’t clean it. Insulation is porous, and mold grows inside it. The only option is removal and replacement. That’s a job for a professional because disturbed insulation releases particles and spores into the air, and without proper containment and filtration, you’re spreading the problem.
Most attic mold situations call for professional help. The space is difficult to work in, the mold is often widespread, and the root cause—whether it’s a ventilation failure, a hidden leak, or improper venting from bathrooms and kitchens—requires expertise to diagnose and fix. We contain the area, remove contaminated materials, treat remaining surfaces, and then address the ventilation or moisture issue so it doesn’t happen again. We also use HEPA vacuums and air scrubbers to capture spores during the process, which is something you can’t do with a shop vac and a box fan.
And here’s the part nobody talks about: if you’re planning to sell your home, undisclosed attic mold will show up during the inspection. Buyers walk away, or they demand credits and price reductions that cost more than professional remediation would have in the first place. Fixing it right the first time protects your investment and saves you headaches down the road.
Basement Mold Removal: Foundation and Humidity Issues
Basements are ground zero for moisture problems. They’re below grade, surrounded by soil that holds water, and they’re often the first place to flood when something goes wrong. Add in foundation cracks, poor drainage, and high humidity, and you’ve got the perfect recipe for mold.
Basement mold removal isn’t just about cleaning what you can see. It’s about controlling the water that’s getting in and managing the humidity that’s staying trapped. If you don’t fix both, the mold will be back before you finish putting your cleaning supplies away.
The first step is finding the water source. Is it a leaking pipe? A crack in the foundation? Poor grading outside that’s directing rainwater toward your house? Condensation from an uninsulated cold water pipe? Until you know where the moisture is coming from, you’re just treating symptoms.
Once the water source is under control, you can address the mold. For small areas on concrete walls or non-porous surfaces, a detergent and water solution or a diluted bleach mix can work—just make sure the space is well-ventilated and you’re wearing protective gear. Scrub the surface, rinse it, and dry it completely using fans and a dehumidifier.
But if mold is on drywall, carpet, insulation, or wood framing, and it’s covering more than a small patch, you’re looking at material removal. Porous materials absorb mold deep into their structure, and surface cleaning won’t get it all. The contaminated materials need to come out, the moisture source needs to be fixed, and new materials need to go in. That’s a job for someone with the tools and experience to do it without spreading spores throughout your home.
Humidity control is the long game. Even if you fix the leak and remove the mold, a damp basement will grow mold again. Keep indoor humidity between 30 and 50 percent—use a dehumidifier if you need to. Improve ventilation where you can. Check your gutters and downspouts to make sure water is draining away from your foundation, not toward it. Seal cracks. Consider a sump pump if you’re dealing with recurring water intrusion.
If you’ve tried cleaning basement mold and it keeps coming back, or if you’re seeing mold in multiple areas, it’s time to call a professional. We can assess your foundation, identify hidden moisture sources, and recommend solutions like interior drainage systems, vapor barriers, or waterproofing that actually solve the problem instead of just masking it.
Mold in your home doesn’t mean you’ve failed as a homeowner. It means moisture found a way in, and now you’ve got a decision to make. Small surface mold on non-porous materials? You can handle that. Larger areas, recurring growth, or mold on porous materials like drywall and insulation? That’s when you call in help.
We work with homeowners across Milwaukee County to assess mold situations honestly, fix the moisture problems causing them, and remove mold the right way—so it doesn’t come back. If you’re not sure what you’re dealing with, or if you’ve already tried the DIY route and the problem isn’t going away, reach out. Clear answers and a solid plan beat guessing every time.